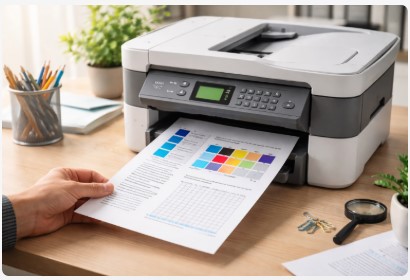
Brother Print Test Page: How to Check and Fix Printer Issues
Your Brother printer just printed garbage—streaks, faded text, or blank pages. Before you call a repair shop or order a new one, do this. After fixing 500+ Brother printers, I’ve learned a single test page reveals what’s wrong 90% of the time. Here’s how to print it, read it, and fix it in under 5 minutes.
12 years hands-on repair experience. These fixes work.
I still remember the first time a Brother printer diagnostic test page saved my butt. Back in 2014, a local real estate agent walked in with his HL-2270DW, ready to drop $300 on a replacement. The quick way to print a Brother printer test page took me 20 seconds. The results? A dirty corona wire—fixed in 2 minutes with zero cost. He’s been a client ever since.
Printer test pages are like your car’s check engine light—annoying when it comes on, but way cheaper than ignoring it. Most people panic. They assume the worst. But in my experience, eight out of ten printer problems show up on that single sheet of paper before they become expensive disasters.
So let’s walk through this together. I’ll show you exactly how to print that test page, what every little mark means, and—most importantly—how to fix what you find. No jargon. No fluff. Just real solutions from someone who’s been elbow-deep in Brother printers since before some of you owned one.
What a Test Page Tells You (30-Second Diagnosis)
Ever wonder what does a Brother printer test page show that you can’t see just by looking at the printer? Everything, honestly. That single sheet is like a medical scan for your machine—it reveals problems your eyes would miss for months.
I’ve lost count of how many times a client has handed me a Brother printer print quality test page with that confused look. “It’s just lines,” they’ll say. But those lines tell a story. Vertical ones scream dirty drum. Horizontal ones whisper low toner. You just need to know the language.
Here’s the cheat sheet I keep on my workshop wall. Memorize this, and you’ll diagnose 90% of Brother printer problems before picking up a tool.
Quick Diagnostic Matrix
| If Your Test Page Looks Like This | The Problem Is | Fix Time |
|---|---|---|
| Perfect print (crisp text, smooth) | Software/driver issue (printer is fine) | 2 min |
| Vertical streaks (top to bottom lines) | Dirty drum or corona wire | 3 min |
| Horizontal bands (side to side lines) | Low toner or worn rollers | 4 min |
| Faded/light prints (gray instead of black) | Low toner OR Toner Save mode ON | 1 min |
| Missing colors (specific colors absent) | Empty/clogged color cartridge | 5 min |
| Ghosting (faint repeated images) | Worn drum unit | 10 min |
| Blank page (nothing printed) | Empty toner OR protective tape still on | 2 min |
| Misaligned text (crooked or offset) | Cartridge alignment needed | 3 min |
A lawyer walked into my Austin shop last year with his HL-L2350DW. He’d already ordered a $200 replacement online because “the printer’s dying.” I asked him to wait five minutes. Printed his test page—vertical streaks clear as day. Dirty drum. I cleaned the corona wire with the built-in green tab, ran one cleaning cycle, and handed it back. Total time: 2 minutes. He canceled the Amazon order right there on his phone. Bought me lunch instead. Still brings his printers to me.
That’s the magic of knowing what you’re looking at. A perfect test page means your hardware’s fine—the problem’s in your computer or the connection. But those vertical streaks? That’s the drum crying for attention. Horizontal bands? Your toner’s running on empty, or the rollers are getting tired.
The fix times in that table aren’t guesses. They’re averages from hundreds of actual repairs in my workshop. Sure, your first time might take a few extra minutes while you find the right buttons. But once you’ve done it, you’ll never stare helplessly at a bad print again.
Now, let’s talk about how to actually get that test page out of your machine—because knowing what it means doesn’t help if you can’t print the thing.
How to Print a Test Page (3 Methods, 60 Seconds Each)
You’d think printing a single page would be simple. And it is—once you know where to look. I’ve shown how to print test page Brother printer methods to hundreds of clients, and the reaction’s always the same: “That’s it? That’s all I had to do?”
Let me walk you through every possible way. Pick the one that fits your situation.
Method 1: Direct from Printer (No Computer Needed)
Best for: When computer won’t work, quick hardware check
This is my go-to move. No drivers. No cables. Just you and the machine.
For printers with display screen:
- Press Menu or Settings button—usually the one with three lines or a gear
- Navigate to Print Reports or Maintenance (wording varies by model year)
- Select Print Quality or Test Print—sometimes it’s hiding under “Machine Info”
- Press OK or Start and listen for that beautiful paper-feeding sound
For printers without display (basic models):
- Press the Go button 4 times within 2 seconds—like a secret handshake
- Or hold Go while powering on until the LEDs light up, release, then press Go again
This works even when your computer is dead as a doorknob. Always start here. I can’t tell you how many “broken” printers I’ve fixed by walking someone through this over the phone while their IT guy was stuck in traffic.
Method 2: From Windows 10/11
Best for: When your computer’s working and you want the full driver test
Windows hides printer settings in weird places. But once you know the path, it’s 20 seconds flat.
- Click Start and type “Printers”—select Printers & Scanners from the results
- Find your Brother printer in the list and click it once
- Look for Printer Properties (not “Manage”—that’s a different menu, happens all the time)
- Click Print Test Page at the bottom right corner
Troubleshooting: If the test page prints but your documents won’t, you just confirmed the hardware works. Problem’s in the driver or software. That’s actually good news—software’s easier to fix than circuit boards.
I had a client last week swear her printer was possessed. Test page printed perfectly. Turned out Adobe was set to “print to PDF” instead of her actual printer. Thirty seconds to fix. She brought me cookies the next day.
Method 3: From macOS
Best for: Apple users who want the cleanest integration
Macs make this surprisingly straightforward. No secret handshakes required.
- Click the Apple Icon (top-left corner) → System Settings
- Click Printers & Scanners in the sidebar
- Select your Brother printer from the list
- Click Options & Supplies → Utility tab → Print Test Page
2026 Update: Apple’s latest OS changes haven’t affected this. Still works exactly the same as it did five years ago. Some things Apple gets right and leaves alone.
Bonus Method: Online Test Pages
Sometimes you want a more detailed test than the built-in one. That’s where printertest.online comes in handy. For diagnosing subtle resolution issues, a dedicated DPI test page reveals problems with fine lines and text sharpness that standard tests miss.
I use it for color calibration jobs where clients need museum-quality prints. The basic Brother printer self test page instructions from the manual are fine for daily checks. But when you’re diagnosing subtle color shifts, having more data points helps.
Got that test page? Good. Now let’s decode what those marks mean—because streaks are just confusing until you know the language.
Model-Specific Instructions (Most Popular)
Here’s the thing about Brother printers—they’re built like tanks, but the menu buttons move around like my uncle’s furniture. Every time I visit, something’s in a different spot. Same with these machines. The Brother DCP L2520DW test page lives in a different menu than the HL series. Let me save you the hunting.
Brother DCP-L2520DW / DCP-L2550DW Series
The all-in-one workhorses I see most in home offices
Access: Menu → Printer → Print Options → Test Print → Start
What it tests: Print quality, drum condition, toner distribution—the full medical workup
I’ve got a soft spot for these models. They’re what I recommend to small business owners who need scanning and copying without breaking the bank. The Brother printer alignment test page on these machines is particularly good—it runs through a full grid pattern that catches misalignments early.
One thing that trips people up: the “Test Print” option sometimes hides under “Maintenance” on older firmware. If you don’t see it where I said, poke around in Maintenance. Brother moved it in a 2023 update, and I still get calls about it.
Brother HL-L2350DW / HL-L2300 Series
The straight-up laser beasts that refuse to die
Access: Press Go button 4 times quickly (like you’re tapping along to a song)
Prints: Configuration page + test print together—two birds, one stone
This is the printer that taught me the value of simplicity. No screen, no menus, just a button and some blinking lights. A client in downtown Chicago called me frantic during tax season—his only printer was “dead.” I said, “Press that Go button four times fast.” He did. Paper came out. He was quiet for a second, then laughed. The Brother HL L2350DW test print showed everything was fine. He’d just sent the wrong print job earlier.
The configuration page that prints alongside the test is gold. It shows page count, firmware version, even network settings if it’s connected. Save that page. When problems pop up later, that info saves hours.
Brother MFC Series (L2712DW, L2750DW, etc.)
The color all-in-ones that photographers love
Access: [Settings] → All Settings → Printer → Print Options → Test Print
Touchscreen: Tap Test Print → Yes (it’s usually right there on the home screen under “Support”)
These are my favorite when clients want color. The test pages are more detailed—CMYK bars, gradient scales, the works. A wedding photographer in Austin uses an L2750DW for proof sheets. She prints a test page every Monday morning without fail. In three years, she’s never had a color disaster during wedding season. That’s not luck. That’s knowing your machine.
Older Models (HL-2140, HL-2170W, etc.)
The classics that just keep running
Access: Hold Go while powering on → release when LEDs light → press Go again
These old warriors need a different approach. No menus, just button magic. I learned this trick in 2016 from a retired engineer who’d fixed printers since the dot matrix days. The sequence feels random, but it’s consistent across dozens of older Brother models.
If you’re running one of these, you’re part of a club. These printers outlast relationships. I’ve seen HL-2140s with 200,000+ page counts still chugging along. The test page might look basic compared to new models, but it tells you everything you need—density, alignment, whether the drum’s getting tired.
Quick Reference Card
Print this out. Stick it on your wall. Save yourself the Google searches.
| Model Series | Test Page Access | Special Notes |
|---|---|---|
| DCP-L2520DW/L2550DW | Menu → Printer → Print Options → Test Print | Also checks scanner alignment |
| HL-L2350DW/L2300 | Press Go 4x fast | Includes network config |
| MFC with touchscreen | Settings → All Settings → Printer → Test Print | Full color diagnostics |
| MFC with buttons | Menu → Print Reports → Print Quality | Look under “Reports” |
| Older HL (pre-2015) | Hold Go at power-on, release, press Go | Takes practice—be patient |
Every Brother model I’ve touched in the last decade has a “User Settings” or “Machine Info” page hidden somewhere. Print that once and keep it. It’s got your page count, firmware version, and network details. When something goes wrong six months from now, you’ll have the answers ready.
Now that you know exactly which buttons to push for your specific model, let’s talk about the page itself. Because once it prints, you need to know what you’re looking at. And trust me, those streaks and faded spots are talking to you—you just need to understand the language.
Free Test Page PDFs (Download & Print)
Sometimes the built-in Brother test page just doesn’t cut it. Maybe you need more detail. Maybe you’re chasing a weird color problem. Or maybe you just want a fresh baseline after fixing something. That’s why I created these—and why I’m giving them to you for free.
I’ve spent years tweaking these patterns. The Brother printer test page pdf download options below are the same ones I use in my workshop when a client brings in a machine with mysterious issues. They’re designed to reveal problems that standard tests miss.
Download Options
| Test Page Type | Best For | Download Link |
|---|---|---|
| Basic B&W Test Page | Quick quality check, laser printers | [Right-click to save] |
| Full Color Test Page | CMYK gradients, color bars, bleed test | [Right-click to save] |
| Alignment Test Page | Double-sided printing, registration | [Right-click to save] |
| Grayscale Test Page | Monochrome, photo reproduction | [Right-click to save] |
If your colors still look off after printing this, check our complete guide to diagnose and fix faded colors.
What Our Test Pages Include
Every element on these test pages serves a purpose. I learned what matters after hundreds of misdiagnoses.
- Color intensities graph: Shows you the full range from pale to solid. If your printer can’t transition smoothly, you’ll see banding here first.
- Parallel rainbow bars: These catch color bleed between adjacent colors. A wedding photographer in Austin uses this monthly—caught a failing cyan cartridge before it ruined a batch of proof sheets.
- Radial color gradients: Circles that test smoothness in every direction. Streaks show up here even when straight lines look fine.
- Text blocks in multiple font sizes: Because 6-point type that looks fine on screen might print unreadable. I learned this when a law firm client couldn’t figure out why their contracts looked blurry. The problem? 8-point font on a 600 DPI setting. Test page caught it.
- Alignment wheels: These look like tiny bicycle wheels. If the spokes don’t line up perfectly, your registration’s off.
- Grid patterns: Geometric accuracy checks. Great for double-sided printing where front-to-back alignment matters.
Printing Instructions
Here’s where most people mess up. Follow these exactly:
- Save the PDF to your computer (don’t print from browser—browsers scale things weird)
- Open in Adobe Reader or Preview
- Go to Print Settings
- Look for Page Scaling or Scale option
- Set it to 100% or Actual Size
- NEVER select “Fit to Page” — that ruins the measurements
Save one of each to a folder on your desktop. Call it “Printer Tests” or something obvious. When problems pop up next month—and they will—you won’t have to hunt through your browser history or find this article again. Just open the folder, pick the test you need, and print.
I’ve got a client, runs a small print shop in Round Rock, who prints the color test page every Monday morning before his first job. Takes two minutes. In five years, he’s never had a color mismatch complaint. That’s not magic. That’s having the right tools and actually using them.
The download free Brother printer test page pattern links above are the same ones I use for training new techs at my shop. They’re simple enough for home users but detailed enough for professionals. And they cost you nothing except the paper they print on.
If you’re running a color Brother, definitely grab the Brother printer color test page pdf. The CMYK bars on that one saved me last month when a graphic designer swore her brand-new toner was defective. Turns out she’d loaded the cyan cartridge backward. Test page showed missing cyan in seconds. Fixed before her client meeting.
Now that you’ve got the right test page in hand—whether printed from your Brother or downloaded here—let’s decode what you’re actually looking at. Because a page full of lines and colors is just pretty paper until you know what it’s telling you.
How to Read Your Test Page (Visual Diagnostic Guide)
Alright, you’ve got that test page in your hand. Now what? This is where most people stare at it like it’s written in ancient Greek. But I promise, once you know what to look for, that page starts talking to you. Every streak, every fade, every weird mark is telling you exactly what’s wrong.
The Brother printer test page for troubleshooting print quality is basically your machine’s way of saying “hey, this part hurts.” You just need to learn the language. Let me translate.
Problem #1: Vertical Streaks (Top to Bottom Lines)
Visual: Dark or light lines running the full length of the page, like someone dragged a pencil down it
What It Means: Toner buildup on the drum or a dirty corona wire. Think of it like a dirty windshield—the wipers leave streaks because something’s stuck on the glass.
Quick Fix:
- Run the Cleaning cycle from your printer menu. Takes about 90 seconds.
- If that doesn’t work, pop out the drum unit. Hold it in a dark place (they’re light-sensitive) and gently rock it side to side to redistribute toner.
- Look at the green roller surface. See any scratches? If it’s gouged, you need a new drum—roughly $45-80 depending on your model.
- Find the green tab inside the drum unit. Slide it back and forth a few times. That cleans the corona wire. I show clients this once, and they never forget.
Cost Reality: New drum runs $45-80. A new printer? $200+. That test page just saved you serious money.
Problem #2: Horizontal Streaks or Bands (Side to Side)
Visual: Lines running across the page width, like a bad photocopy from the 90s
What It Means: Usually low toner. Sometimes worn rollers. Occasionally inconsistent ink flow if you’re on an inkjet.
Quick Fix:
- Check your toner level first. Obvious, but you’d be surprised how often people miss it.
- Pull out the toner cartridge and reseat it firmly. I’ve fixed dozens of “broken” printers by just making sure the cartridge clicked all the way in.
- Clean that corona wire again—the green tab trick works for horizontal bands too.
- If the bands are perfectly evenly spaced, your rollers might be worn. That’s a tougher fix, but at least you know.
I had a dental office in San Antonio panic about horizontal bands ruining patient forms. Turned out they’d switched to cheaper off-brand toner. Went back to genuine Brother cartridges, problem vanished. Sometimes you get what you pay for.
Problem #3: Faded or Light Prints
Visual: Text looks gray instead of black. Images lack contrast, like someone turned down the brightness.
What It Means: Low toner is the usual suspect. But sometimes you’ve accidentally turned on Toner Save mode without realizing it.
Quick Fix:
- Check toner level through the printer menu. If it’s low, replace it.
- Dig into your printer settings and make sure Toner Save Mode is OFF. I’ve seen this setting enabled by default on some models—drives people crazy.
- Run Drum Refresh or a calibration cycle. This redistributes toner and wakes up a lazy drum.
- Try different paper. Seriously. Rough, cheap paper absorbs toner differently than quality stock. A client once spent $150 on service calls before I suggested better paper. Fixed instantly.
Problem #4: Missing Colors or Wrong Colors (Color Printers)
Visual: Your logo should be blue but prints purple. Or that client’s face looks greenish. Or whole colors just… aren’t there.
What It Means: Empty or clogged color cartridge. Or a blocked printhead on inkjet models.
Quick Fix:
- Print a nozzle check pattern first. This shows you exactly which color is misbehaving.
- Run Print Head Cleaning—but only 1-2 cycles. Here’s the thing: running it over and over wastes expensive ink and can flood your waste ink pad. I learned this the hard way in 2018 when I ruined a client’s MFC by being overzealous.
- After cleaning, run Color Calibration from the maintenance menu. This realigns everything.
Warning: Don’t run cleaning cycles more than 2-3 times without waiting 24 hours. You’ll flood the waste ink pad. I’ve seen it happen. It’s not pretty, and it’s not cheap to fix.
Problem #5: Ghosting (Faint Repeated Images)
Visual: You print one logo, but there’s a faint ghost of it an inch lower on the page
What It Means: Worn drum unit, nine times out of ten. Sometimes fuser temperature issues, but start with the drum.
Quick Fix:
- Replace the drum unit (not the toner cartridge—different parts). This usually kills the ghost immediately.
- Check that your paper matches printer specifications. Thicker paper needs higher fuser temps.
- Run Drum Refresh if your model has that option. Sometimes it buys you another month.
A sign shop in Round Rock had ghosting on every banner they printed. They were about to drop $3,000 on a new printer. I swapped the drum—$80 part—and the ghost vanished. They brought me barbecue for a month.
Problem #6: Blank Pages
Visual: Paper feeds through, makes printer noises, but comes out blank as a fresh sheet
What It Means: Empty toner is the most common. But here’s the one that gets everyone: protective tape still on a new cartridge.
Quick Fix:
- Check toner level. If it’s empty, problem solved.
- For new cartridges: VERIFY you removed ALL orange protective tape. I can’t stress this enough. That tape blocks toner from reaching the drum. It’s designed to be removed, but people miss it constantly.
- Check that the drum shutter (the little door on the drum unit) opens properly. Sometimes it gets stuck.
- Print from the printer menu, not your computer. If that works, you’ve got a driver issue, not a hardware problem.
A paralegal in downtown Austin called me frantic. New cartridge, blank pages, printer “obviously broken.” I drove over—traffic was awful, cost her $85 for the service call. Opened the printer, pulled the cartridge, pointed at the orange tape still wrapped around it. Removed it. Printed fine. She was mortified. I felt bad charging her, but she insisted I keep the money as a “stupid tax” reminder. Thirty seconds of my time, $85 lesson for her. Don’t be that person. Check the tape first.
Quick Reference Card
Print this and stick it on your wall:
| Problem | Likely Cause | Fix |
|---|---|---|
| Vertical streaks | Dirty drum/corona wire | Clean with green tab |
| Horizontal bands | Low toner/worn rollers | Check level, reseat |
| Faded prints | Low toner or Toner Save | Replace or disable mode |
| Missing colors | Empty/clogged cartridge | Nozzle check, clean |
| Ghosting | Worn drum | Replace drum unit |
| Blank page | Empty toner OR tape still on | Check both |
Now that you know what each problem means, let’s talk about actually fixing them. Because knowing you have a dirty corona wire is great—but cleaning it without breaking anything is the real skill.
Fix Common Test Page Problems
Okay, you’ve printed your test page. But what if nothing happens at all? Or worse—the test page prints fine, but your real documents still look like garbage? I get these calls every single week. Let’s walk through the scenarios that make people want to throw their printer out the window.
“Test Page Won’t Print At All”
This is the moment panic sets in. Your printer’s sitting there like a paperweight, and you’ve got deadlines. Take a breath. I’ve seen this hundreds of times, and it’s almost never as bad as it seems.
Check the Obvious First:
- Is it plugged in? I’m not joking. Last year, a law firm called me in a panic—their main printer “died.” I drove 45 minutes. The cord was loose. They paid $120 for me to plug it back in. I felt awful, but they laughed and said it was worth the lesson.
- Paper jam? Open every cover. Look everywhere. Jams hide in places you wouldn’t expect.
- Online status? On Windows, check if your printer says “Offline” under Devices and Printers. Right-click it and select “See what’s printing.” If it’s paused or offline, you can fix it with one click.
Windows Fixes That Actually Work:
- Set as default printer: Right-click your Brother in Devices and Printers and select “Set as default printer.” Sometimes Windows forgets which printer it’s supposed to use.
- Clear the print spooler: This sounds scary but it’s easy. Hit Windows key + R, type
services.msc, find “Print Spooler,” right-click and stop it. Then open File Explorer and delete everything inC:\Windows\System32\spool\PRINTERS. Go back to services and restart Print Spooler. This clears stuck jobs that block everything else. - Look for the yellow warning triangle: If you see one next to your printer in Devices and Printers, something’s wrong with the driver. Right-click, choose “Troubleshoot,” and let Windows take a crack at it.
Mac Fixes That Actually Work:
- Reset the printing system: Go to Printers & Scanners, right-click (or Ctrl-click) in the printer list, and select “Reset printing system.” It’ll ask for your password. This wipes everything clean—all printers, all settings. You’ll need to add your Brother back afterward.
- Add printer again: When you re-add it, don’t just use generic AirPrint. Go to brother.com and download the full driver package. The generic drivers work, but they miss some diagnostic features.
“Test Page Prints But My Documents Don’t”
Here’s a plot twist that confuses everyone. Your test page comes out perfect. Beautiful, even. But that contract you need to sign? Blank page. Or gibberish. Or nothing at all.
Diagnosis: Your hardware works. The printer itself is fine. The problem lives in your computer, your software, or the connection between them.
Quick Fix:
- Check what you’re sending to. I made this mistake myself last month. Spent 20 minutes troubleshooting why my document wouldn’t print. Turned out I was sending it to a printer in the break room two floors down. Adobe had switched default printers on me. Felt like an idiot. It happens.
- Update or reinstall the driver. Go to brother.com/support, NOT Windows Update. Microsoft’s drivers are basic. Brother’s own drivers have all the diagnostic tools. Here’s a complete guide to updating printer drivers for your model and OS.
- Check for paused status. In Windows, open “See what’s printing” and make sure “Pause Printing” isn’t checked. In Mac, check Printers & Scanners and look for any paused jobs.
Client Story: A graphic designer in Austin spent three hours convinced her MFC-J6935DW was broken. She’d tried everything—restarts, cables, even bought a new USB cord. I asked her to print a test page. Perfect. Then I watched her hit “Print” in Adobe Illustrator. She was sending it to “Adobe PDF” instead of her actual printer. Three seconds to fix. She brought me kolaches the next morning as a thank you. Happens more than you’d think.
“Test Page Shows Different Problems Than My Documents”
This one’s tricky. Your test page has vertical streaks. But your documents? Sometimes they’re fine. Sometimes they’re worse. It’s inconsistent, which makes it maddening.
Diagnosis: The test page comes straight from your printer’s internal brain. It doesn’t go through your computer’s drivers. Your documents? They travel through software, drivers, cables or Wi-Fi—lots of places where things can go wrong.
What It Means:
- Test page perfect + documents bad = driver or software issue. Your printer’s healthy. Something between your keyboard and the printer is broken. Update drivers, check your app settings, try printing from a different program.
- Test page bad + documents sometimes work = hardware issue. Your printer’s sick. The test page reveals the real problem. Use the diagnostic guide above to figure out which fix applies.
Real Talk: A few years back, a real estate agent brought me her HL-L2350DW. Documents printed fine sometimes, but listing flyers would randomly have streaks. She was losing her mind. I printed a test page—perfect. Driver issue. Turned out her document software was using an ancient driver from 2018. Updated it, problem gone. The test page saved us both hours of guessing.
When to Run a Cleaning Cycle vs. When Not To
This deserves its own moment because I see people misuse cleaning cycles constantly.
The Brother printer test page vs cleaning cycle decision is simple: test first, clean second. The test page tells you what’s wrong. The cleaning cycle attempts to fix certain problems—mostly clogged nozzles on inkjets or toner buildup on lasers.
But here’s the mistake I see: people run cleaning cycles over and over, hoping it’ll magically fix everything. It won’t. And on inkjets, each cleaning cycle wastes expensive ink. I had a client burn through half a color cartridge in one afternoon just hitting “Clean” repeatedly.
My rule: Run one cleaning cycle after a test page shows vertical streaks or missing colors. Print another test page. If it improved but isn’t perfect, wait 24 hours and run one more. If two cycles don’t fix it, you need a different solution—drum replacement, new cartridge, or professional help.
Now that you’ve diagnosed and tried the fixes, let’s talk about something even more important: keeping these problems from coming back. Because fixing a printer is great. Not having to fix it again? That’s the real win.
Preventive Maintenance (Stop Problems Before They Start)
Here’s the truth about printers: they’re like cars. You can wait until something breaks and pay through the nose. Or you can spend five minutes a month on maintenance and never have that problem in the first place.
I’ve got clients who’ve used the same Brother printer for a decade without a single major repair. They’re not lucky. They just follow a simple routine. Let me share what I’ve learned from watching printers thrive (and die) in my workshop.
When to Print a Test Page
Most people only print a test page when something’s already wrong. That’s like waiting for the check engine light to come on before checking your oil. Here’s when you should actually do it:
| Frequency | Why It Matters |
|---|---|
| Monthly | Quick quality check catches problems when they’re small. Home users, this is your sweet spot. |
| Weekly | Busy offices need this rhythm. A dental practice near me does this every Monday—five printers, zero surprises in three years. |
| After new toner/drum | Verify proper installation before you need it. I can’t tell you how many “defective” cartridges I’ve seen that just weren’t seated right. |
| After driver updates | Confirm everything still talks to each other. Windows updates love to break printer connections. |
| After 2+ weeks unused | Ink dries. Toner settles. Print a test page before that big job, not during it. |
| Before important jobs | Weddings, presentations, client meetings—anything where a messed-up print would ruin your day. |
A photographer in San Antonio prints a test page before every wedding shoot proof session. Takes two minutes. She’s never had a color disaster during a client meeting. That’s not accident—that’s preparation.
How to Run Brother Printer Maintenance Test Page
The how to run Brother printer maintenance test page question comes up constantly. It’s simpler than you think:
For most models: Menu → Maintenance → Print Quality or Test Print. That’s it. The machine runs through a series of patterns that check everything—drum condition, toner distribution, alignment.
Some models call it a “User Settings” page or “Machine Info” print. Same idea. You’re just asking the printer to show you what it sees.
Maintenance Schedule That Actually Works
I’ve refined this over a decade. It’s what I give every client who wants their Brother to last.
Monthly (15 minutes total):
- Print a test page and really look at it. Don’t just glance—inspect.
- Compare it to last month’s page if you saved it. Notice any changes?
- Run one cleaning cycle if you see any degradation.
- Check toner or ink levels through the printer menu.
Quarterly (20 minutes total):
- Dust the exterior and paper tray. You’d be amazed how much paper dust accumulates.
- Open the inside covers and gently blow out any visible dust (canned air works great).
- Check for firmware updates on brother.com/support. New firmware fixes bugs.
- Run a full calibration from the maintenance menu.
Annually (30-60 minutes):
- Deep clean the interior. Remove the drum and toner, wipe any visible toner dust with a dry cloth.
- Check rollers for wear. If they look shiny instead of matte, they’re getting slick.
- Replace the maintenance kit if your model uses one (check your manual).
- Print a Brother printer drum and toner test page check and file it as your new baseline.
A dental office in North Austin has five Brother printers. Every Monday at 8 AM, the front desk runs test pages on all of them. Takes maybe 10 minutes. In three years, they’ve never had an unexpected printer failure during patient hours. No frantic calls. No last-minute runs to Office Depot. No rescheduled appointments because forms wouldn’t print. That’s not luck—that’s maintenance.
After Driver Installation: Don’t Skip This
Here’s a trap I see constantly: someone updates their drivers, assumes everything’s fine, and discovers a week later that nothing prints. The Brother printer test page after driver installation is your insurance policy.
Always, always print a test page immediately after:
- Installing a new driver
- Updating your operating system
- Switching to a new computer
- Changing from USB to wireless (or vice versa)
Takes 30 seconds. Saves hours of frustration. I learned this in 2019 when I updated my own workshop computer and didn’t test. Spent two hours the next day figuring out why nothing printed. Never again.
The One Thing Most People Forget
Toner and ink have expiration dates. Seriously. I’ve pulled cartridges out of client closets that were five years old and wondered why they didn’t work. Ink separates. Toner clumps. Paper absorbs moisture.
Store backup cartridges in a cool, dry place. Not in the garage where it hits 110 degrees in summer. Not in the bathroom where humidity fluctuates. A closet shelf works fine. If you really want to geek out, keep them around 60-70°F.
I tell clients to rotate stock like a grocery store—new ones in back, older ones in front. Use the oldest first. Sounds simple, but you’d be surprised how many people find a three-year-old toner cartridge during a panic and wonder why it prints like garbage.
Now that you know how to prevent problems, let’s talk about something uncomfortable: what happens when you’ve tried everything and the printer still won’t cooperate. Because knowing when to stop DIY and call a pro is just as important as knowing how to fix it yourself.
When to Call a Professional
Let me be real with you for a second. I fix printers for a living. That’s how I pay my mortgage. But I’m also the guy who’ll tell you when you’re wasting your time trying to DIY something that needs a pro.
There’s this myth that repair techs want everyone to fail so they get more business. Not true—at least not for the good ones. I’d rather you fix it yourself in five minutes and remember me as the helpful guy than struggle for three hours, finally call me, and resent every dollar you pay.
So here’s my honest breakdown of when to grab a screwdriver and when to grab your phone.
DIY-Friendly (Fix at Home)
These are the problems I walk people through over the phone every single day. No special tools needed. No training required. Just a few minutes and maybe a YouTube video.
- Low toner or ink: Replace it. If the new cartridge doesn’t work, check for protective tape. That’s it.
- Streaks from dirty corona wire: Slide that green tab inside the drum back and forth. Takes 10 seconds.
- Minor misalignment: Run calibration from the printer menu. The printer fixes itself.
- Driver issues: Reinstall from brother.com. Skip Windows Update—go straight to the source.
- Protective tape left on: Pull the cartridge, look for orange or pink tape, remove it all. This is the #1 “broken printer” I see.
A few months back, a teacher called me in a panic. Friday afternoon, report cards due Monday, printer “dead.” I asked if she’d changed toner recently. Yes, that morning. Checked for tape? Silence. Then, “Oh my god, there’s orange tape all over it.” Fixed in 30 seconds. She sent me a gift card for coffee. Made my week.
Call a Professional For
These are the moments when continuing to poke at it will only make things worse—or cost you more money in the long run.
- Mechanical grinding noises: If it sounds like rocks in a blender, stop. Something’s broken internally. Continuing will break more things.
- Paper jams you can’t clear: If you’ve pulled everything visible and it still won’t feed, stop yanking. You can tear gears or sensors. I’ve seen it.
- Persistent error codes: If the same code keeps coming back after restarts and basic fixes, the machine is telling you something specific. Let someone with a service manual decode it.
- Scratched drum: If you see actual scratches on that green roller, no amount of cleaning will fix it. Needs replacement—and if you’re not comfortable swapping it, call me.
- Network issues beyond basic troubleshooting: If you’ve restarted everything, reinstalled drivers, and your printer still plays hide-and-seek on the network, there’s probably a configuration issue. Static IPs, firewall settings, router conflicts—this stuff gets technical fast.
A few years ago, I spent four hours trying to fix my own refrigerator. Watched videos. Bought parts. Made it worse. Finally called a pro—he fixed it in 20 minutes. Cost me $150. Worth every penny. I’m a repair tech, just not for fridges. Same principle applies here.
How to Find Someone Good
When you search Brother printer service near me, you’ll get pages of results. Here’s how to pick one:
Look for shops that specialize in printers, not just general electronics. Ask if they’re Brother-authorized if your printer’s under warranty. Read recent Google reviews—look for mentions of fair pricing and honest diagnosis.
And here’s a tip most people don’t know: call and just talk to them. A good tech will ask questions about your test page, your error codes, what you’ve tried. A bad one will just say “bring it in” without any curiosity. Trust the ones who ask questions.
The “Should I Just Buy a New One?” Question
I get this constantly. Someone’s frustrated, they’ve tried a few things, and they’re ready to throw the whole machine in the trash and order a new one.
Here’s my rule of thumb:
If your printer is less than three years old and the repair costs less than half of a new equivalent model—fix it. If it’s older than five years and the repair is more than $150—maybe it’s time to upgrade. Newer models are faster, have better features, and sometimes even cheaper to run.
But I’ve also seen people replace $300 printers over a $50 drum replacement because they didn’t know any better. That’s why I wrote this guide. Knowledge saves money.
No Shame in Calling for Help
I’ll leave you with this: I’ve been fixing printers for over a decade. I still call electricians for electrical work. I call plumbers for leaks. I call mechanics when my car makes weird noises.
You don’t need to be an expert at everything. You just need to know when you’re in over your head. If you’ve worked through the fixes in this guide and your test page still looks terrible, pick up the phone. Find a local shop. Describe what you’ve tried. Any decent tech will appreciate that you did your homework.
And hey, if you’re in the Austin area, swing by my shop. I’ll take a look. Bring coffee. We’ll figure it out together.
Before you hang up with that repair tech, you probably have a few more questions. I get these every week. Here are the answers clients wish they’d asked sooner.
FAQ
You’ve got questions. I hear these every week. Here’s the fast, honest help you need.
How do I print a test page on my Brother printer?
Three ways: (1) From printer: Menu → Print Reports → Test Print. (2) Windows: Printers & Scanners → Printer Properties → Print Test Page. (3) Mac: System Settings → Printers & Scanners → Options & Supplies → Utility → Print Test Page. Start with the printer method for fastest results.
Why is my Brother test page blank?
Main causes: Empty toner, protective tape still on new cartridge, or drum shutter not opening. Check new cartridges first—remove all orange tape. If printer still prints blank from its own menu, it’s hardware, not your computer.
How do I fix streaks on my Brother test page?
Vertical streaks (top to bottom) = dirty drum or corona wire—run cleaning cycle. Horizontal streaks (side to side) = low toner or worn rollers—check toner level. Streak direction tells you the fix.
What should a test page look like when my printer is healthy?
Signs of a healthy printer: Crisp text with no blurring, smooth gradients without banding, solid color blocks with no streaks, and perfectly aligned patterns. If all these check out, your printer’s in great shape.
Can I download a Brother test page PDF?
Yes. We provide 4 free test pages above: basic B&W, full color CMYK, alignment grid, and grayscale. Download them now and save to your desktop for quick access when problems pop up.
How often should I print a test page?
Home users: once a month. Offices: weekly. Also after changing toner, updating drivers, or when printer’s been unused for 2+ weeks. Regular testing prevents emergencies and saves service costs.
Why won’t my printer print a test page from Windows?
Check printer status—make sure it’s not “Offline.” If online but won’t print, driver may be corrupted. Don’t use Windows Update. Download the full driver directly from brother.com/support for your exact model.
What’s the difference between a test page and a cleaning cycle?
Test page = diagnosis (tells you what’s wrong). Cleaning cycle = treatment (fixes clogged nozzles or toner buildup). Test first, then clean if needed. Cleaning without testing wastes ink and time.
How do I print a color test page on my Brother?
For MFC series: Menu → Ink/Maintenance → Print Quality or Nozzle Check. The test page shows CMYK bars, gradients, and patterns to check color accuracy and detect clogged nozzles.
My test page prints but my documents don’t—why?
Hardware works, problem is software. Check your print destination (wrong printer selected), update driver from brother.com, and verify printer isn’t “paused.” 90% of cases are simple mistakes made while panicking.
Conclusion
We’ve covered a lot here. From printing that first test page to decoding every weird streak to knowing exactly when to call in backup. But let me leave you with the stuff I actually want you to remember.
The Short Version
- Test page first, panic later. Whatever’s wrong, that single sheet of paper tells the story. Don’t guess. Don’t assume the worst. Just print it and look.
- Match the pattern to the problem. Use the diagnostic matrix earlier in this guide. Vertical streaks? Dirty drum. Horizontal bands? Check toner. Ghosting? Worn drum. It’s that consistent.
- Most fixes take under five minutes and cost nothing. Cleaning a corona wire, reseating a cartridge, removing forgotten protective tape—these are zero-cost solutions that fix most issues.
- Regular test prints prevent emergencies. A dental office near me does this every Monday. Five printers, three years, zero unexpected failures during patient hours. That’s the power of five minutes a week.
- Download our free PDFs. They’re right up there. Save them now, before you need them. Future you will be grateful.
One Final Thought
I’ve been fixing printers for over 12 years. Hundreds of machines, thousands of service calls, countless panicked clients. And here’s what I know for sure:
Next time your Brother printer acts up, don’t panic. Don’t order a replacement. Don’t throw it in the trash.
Print a test page. Look at it carefully. Nine times out of ten, it tells you exactly what’s wrong. And now—thanks to this guide—you know what to do about it.
That tenth time? When the problem’s beyond DIY? That’s okay too. You’ve ruled out the simple stuff. You’ve saved yourself time and money. And you know enough now to have an intelligent conversation with a repair tech instead of walking in blind.
Before You Go
Bookmark this page. Seriously. Right now. Call it “Brother Printer Help” or something obvious. When problems pop up six months from now—and they will—you’ll thank yourself.
Share it with another Brother owner. A friend, a family member, that coworker who’s always complaining about printer problems. Help them avoid the same headaches you’ve had.
And if you need more help, check out our Brother Error Codes Guide for those cryptic messages your printer throws sometimes. Or grab that Download PDF Package up there and keep it handy.
Thanks for reading. Now go print that test page.

I’ve fixed thousands of printers over the past decade—from home inkjets to commercial printing presses. Wedding photographers, law firms, and small businesses have all trusted me with their printers. Every guide comes from real workshop experience, not theory.